Readiness Checklist
This section covers the basic technical equipment and access most NYU Langone Health employees need to work remotely. If you will be using an NYU Langone-managed device or are already familiar with remote access, proceed to step 4.
For instructions on connecting via the NYU Langone Advanced Access App, click here.
Step 1: Set up Duo 2-Factor Authentication on NYU Langone network
To set up Duo 2-Factor Authentication, please login to https://atnyulmc.org and click on “Register for Duo Mobile”, from the top right of InsideHealth.
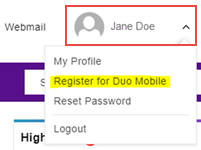
If you are unable to complete the instructions above, contact the Help Desk at (212) 263-6868.
Step 2: Check Computer Compatibility
To work remotely, you will need a computer that meets these requirements:
- If you have an NYU Langone-managed computer: Skip ahead to Step 4.
- If you plan to use your personal computer: Your computer’s operating system should be at minimum:
- Windows 8.1 or higher. See this guide for Windows to determine your OS.
- macOS High Sierra (version 10.13) or higher. See this guide for Mac to determine your OS.
- If you do not have an NYU Langone-managed computer or a personal computer: Talk to your manager.
Step 3: If using a Personal Computer, Download Citrix Receiver
If you are using a Personal Computer, you must install Citrix Receiver to protect your data and NYU Langone’s network. This will also provide access to shared drives and your frequently used applications.
- Download Citrix Workspace for Windows PC
- Download Citrix Workspace for Mac
- Mac OS 10.13 or higher (does not work on Chrome)
- Mac OS 10.12 or 10.11
Step 4: Test Your Computer Set-Up
- Open a browser while connected to the internet from your remote location.
- Log in to https://atnyulmc.org and complete Duo 2-Factor authentication if prompted.
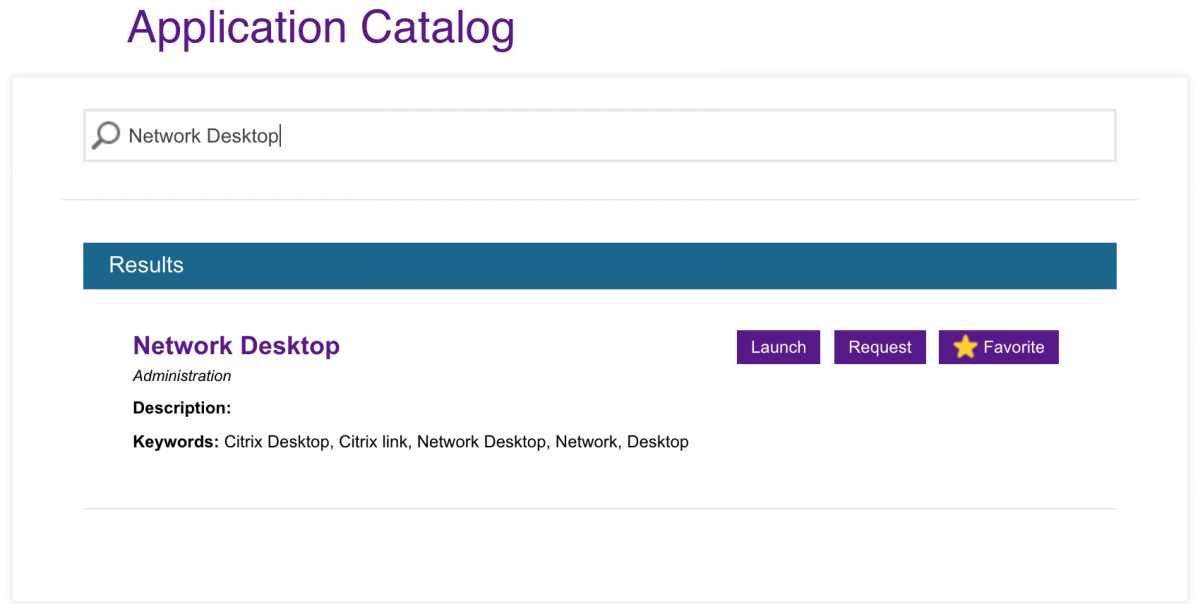
- Next, navigate to the Application Catalog of InsideHealth by clicking “View All” to the right of “My Applications.” Search Network Desktop. and click “Launch.”
- The Citrix Web Interface will open. Follow the prompt on this page and click the “Click to Connect” link.
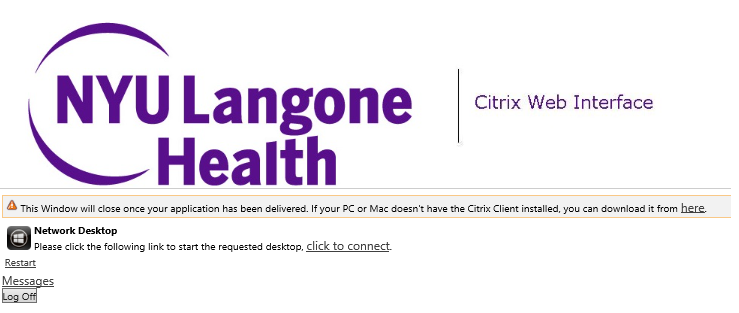
- A file labeled “launch.ica” will download to your computer. Double click to open this file. Network Desktop will open, and you can begin working as you normally would at the office.
If you receive an error, please ensure Citrix Receiver has been installed on your device. Refer to the Frequently Asked Questions document available at http://atnyulmc.org/help-documentation/faqs for more info about the launch.ica file.
Resources for Working Remotely
MCIT is committed to providing you with the best tools for working with your colleagues, no matter where you are. Use our resource guide here to access tools, services, and information that can improve your remote working experience.
If you have received equipment to enable you to work from home, you can click here for more instructions on setting up your hardware, including a how-to video.
Network Desktop
Network Desktop is a remote method of connecting to a standard NYU Langone desktop. All your shared drives are also available on Network Desktop.
For key differences between your Local PC at work and Network Desktop click here
- Open a browser while connected to the internet from your remote location.
- Log in to https://atnyulmc.org and complete Duo 2-Factor authentication, if prompted.
- Next, navigate to the Application Catalog of InsideHealth by clicking “View All” to the right of “My Applications.” Search Network Desktop and click “Launch.”
- The Citrix Web Interface will open in a new window in your browser. Follow the prompt on this page and click the “Click to Connect” link.
- A file labeled “launch.ica” will download to your computer. Double click to open this file. Network Desktop will open, and you can begin working as you normally would at the office.
If you receive an error, please ensure Citrix Receiver has been installed on your device. Refer to the Frequently Asked Questions document available at http://atnyulmc.org/help-documentation/faqs for more info about the launch.ica file.
Webex Meetings
Webex Meetings allows you to host or participate in audio and video conferences, screen sharing, and white boarding with your colleagues.
To join a Scheduled Webex meeting:
- If Network Desktop is open, minimize the Network Desktop window.
- In webmail open the meeting invite and click Join Webex Meeting.
- If Webex meeting does not automatically launch, go to https://nyumc.webex.com/ and enter the meeting ID number provided in the invite.
- Click the Join meeting button.
- Once you have joined the meeting you will see a pop up to select your audio and video connection.
First time users of Webex meetings may be prompted to download and install the Webex add-on:
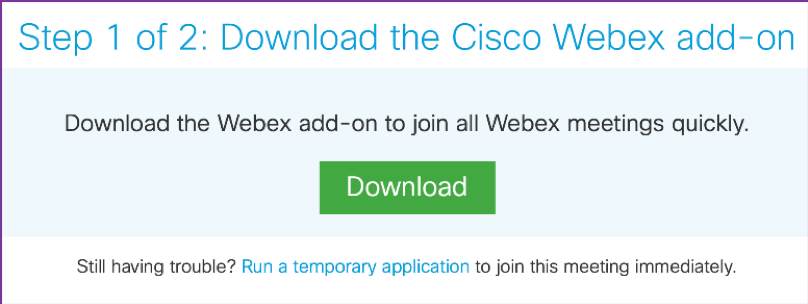

You may also use the alternative link provided to run a temporary application. Double-click on this file in your Downloads directory to run.
Connecting to Audio or Video when Joining a Webex Meeting:
- Call Me: Webex will call you at the number you provide.
- Use My Computer Audio: Webex will connect to audio using your computer’s microphone and speaker.
- I Will Call In: You dial into the Webex meeting using the phone number and access code provided in your meeting invitation email.
You can also download the WebEx Meet mobile app to join a meeting from an NYULMC-provided mobile phone or a personal device.
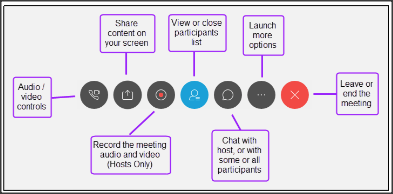
Meeting participants have several useful controls available at the bottom of the Webex interface screen:
Schedule a future Webex meeting:
- If Network Desktop is open, minimize the Network Desktop window
- Go to https://nyumc.webex.com and navigate to “Host a Meeting” section in the vertical menu on the top left corner of the page to expand its “Host a Meeting” section.
- Then, click “Schedule a Meeting”.
- Enter the meeting topic, date of the meeting, time, and duration
- Either enter the attendees’ email addresses or you can opt to leave this field blank.
- Under the attendees’ section, select “Send a copy of the invitation email to me”.
- You will receive an email invite that contains the link to start the meeting.
- You will also receive an email labeled as “Forward to Others,” which you can use forward to meeting participants from Webmail.
- Click on “Schedule Meeting” or “Start” at the bottom of the screen to complete scheduling the meeting and to receive the emails.
MyTime (Kronos)
You will still need to clock in every day while you are working remotely. You can do this by accessing MyTime (Kronos) from the InsideHealth app catalog.
How to Launch:
- Log in to https://atnyulmc.org using Firefox
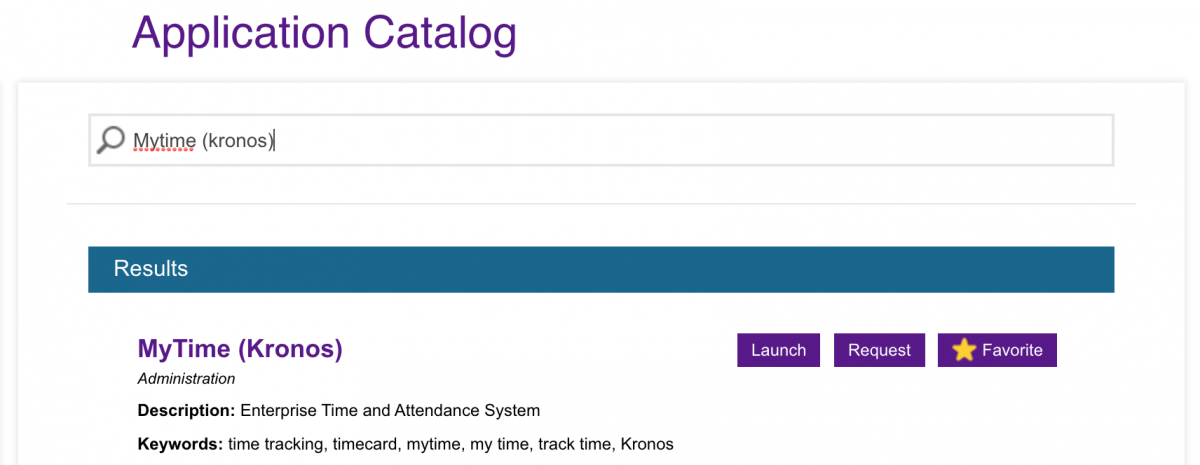
- Next, navigate to the Application Catalog of InsideHealth by clicking “View All” to the right of “My Applications.’ Search MyTime (Kronos) and click “Launch.”
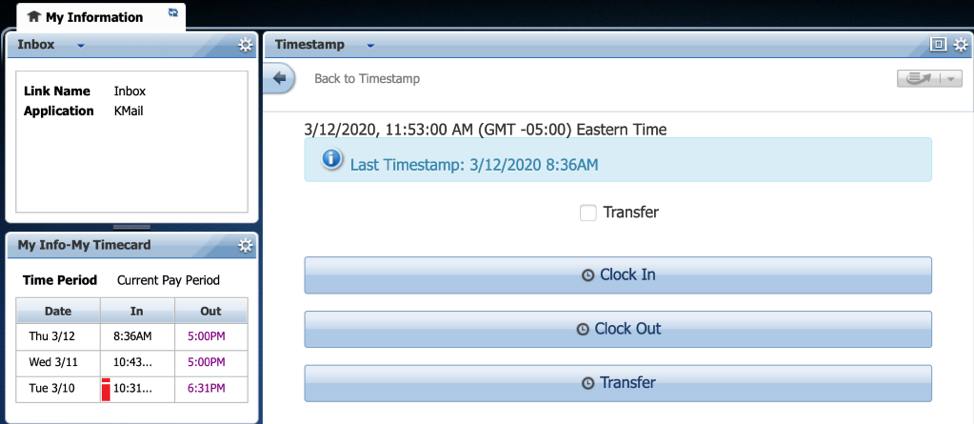
- A separate window will open and you will be prompted to enter your KID credentials.
- Here you will see the options to clock in. Clock-in as you normally would:
OneDrive
OneDrive provides anytime, anywhere access to your files. It enables document sharing and collaboration services between users.
- Log in to https://atnyulmc.org and complete Duo 2-Factor authentication if prompted.
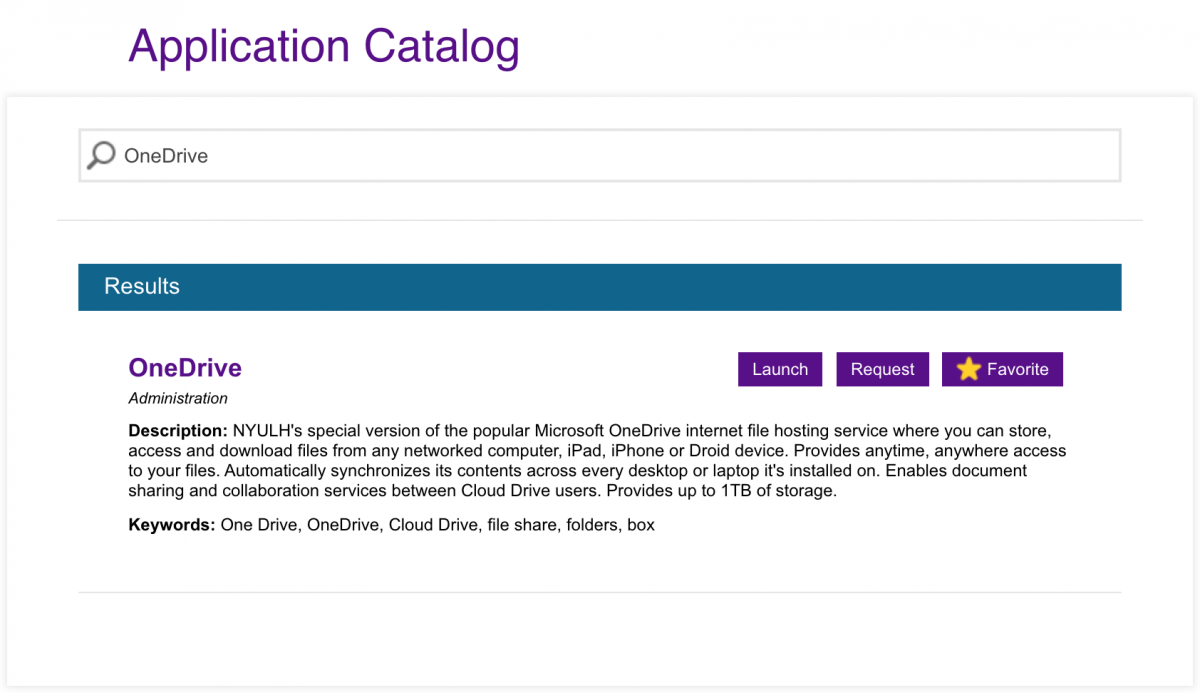
- Next, navigate to the Application Catalog of InsideHealth by clicking “View All” to the right of “My Applications.” Search OneDrive and click “Launch.”
Shared Drives
You can access your shared drives from Network Desktop.
- Log in to https://atnyulmc.org and complete Duo 2-Factor authentication if prompted.
- Next, navigate to My Applications on the right-hand side of the InsideHealth home screen and launch Network Desktop.
- If you do not see Network Desktop under this section, click View All and search “Network Desktop” in the Search Applications bar to find the application and then click “Launch”
- If you do not see Network Desktop under this section, click View All and search “Network Desktop” in the Search Applications bar to find the application and then click “Launch”
- A separate window, Citrix Web Interface, will open in your browser. Follow the prompt on this page and click the “Click to Connect” link.
- From there, a file labeled “launch.ica” will download to your computer. Double click to open this file. Network Desktop will open, and you can access your shared drives as you normally would at the office.
If you receive an error, please ensure Citrix Receiver has been installed on your device. Refer to the Frequently Asked Questions document available at http://atnyulmc.org/help-documentation/faqs for more info about the launch.ica file.
Jabber
Jabber is essential to individually or group chat between colleagues.
- If you are in Network Desktop, minimize the window and open this page on your local browser.
- Click the following link as applicable to download Jabber on your device:
- A new window will open with the file ready for download.
- Click the ‘Download’ button and the file will appear at the bottom of your browser or in your Downloads folder.
- Double click the file and follow all default installation prompts by clicking “Accept and Install”
- Jabber will automatically open after installation is complete. From here, you will be prompted to enter your KID@nyumc.org and password to login.
- For example:
Name: John Sample
KID: SampJ01
Login to Jabber: SampJ01@nyumc.org
- For example:
Email (Webmail)
- Navigate to https://mail.nyumc.org/ (a link to webmail is also available from atnyulmc.org)
- Login with your KID and password.
Note: For the full Outlook experience, launch Network Desktop (see below) and launch Outlook from the Start menu inside Network Desktop.
For questions or concerns, please reach out to the MCIT Help Desk
NYU Medical Center Help Desk
- (212) 263-6868
- Extension 36868 (Internal)
- Toll Free (866)-276-1892
- Open a ticket online using Self Service.
NYU Brooklyn Help Desk
NYU Winthrop Help Desk